Replacing newel caps can instantly improve the look of any staircase. Newel post cap replacement is a quick, cost-effective alternative to replacing the entire staircase or updating the spindles and handrails. So, what are the key steps involved in replacing newel caps?
Here’s a brief overview of how to replace your newel caps:
- Check how the newel cap is secured - it might be glued, pegged or screwed in place.
- For a flat newel cap, use a sharp chisel or craft knife to run around the join and then carefully hit the underside of the cap to loosen it. For a ball or acorn newel cap, cut across the newel post to create a level surface and then sand it smooth.
- Attach your new newel cap with a small amount of wood glue.
In this blog, we break down what’s involved in replacing some of the more popular styles of newel caps. These instructions will help you to fit our timber flat newel caps or our forge metal flat caps.
- How to replace a square newel cap with a flat newel cap
- How to replace an acorn/ball newel cap with a flat newel cap
Read on for an in-depth explanation of newel post cap replacement from our staircase experts.
How to fit a timber newel post cap
How to fit a metal newel post cap
How to replace a square newel cap with a flat newel cap
If you have an existing square or flat newel cap and want to replace it with a new flat newel cap, this is the process you need to follow:
1. Check if the current newel cap is screwed or glued into place.
-
- If the newel cap is screwed into place, there will likely be a circular shape on the top of the newel cap that is noticeably different to the surrounding timber. This is known as a cover button and is used to hide drill holes. If the newel cap is painted and the cap is screwed on, the cover button will look like a circular bump on the top of the newel cap.
- If the newel cap is glued, there will be no noticeable marks at the top of the newel post and the cap should be relatively easy to replace.
If you don’t feel confident removing the newel cap, contact a joiner for advice.
If your newel post is painted, continue to step 2.
If your newel post is not painted, continue to step 3.
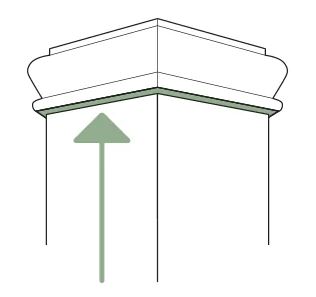
2. Use a sharp chisel or craft knife to run around where the newel cap joins the newel post. Work carefully and slowly to avoid any accidents. This will help to stop the paint splitting and leaving a poor finish after you have removed the cap.
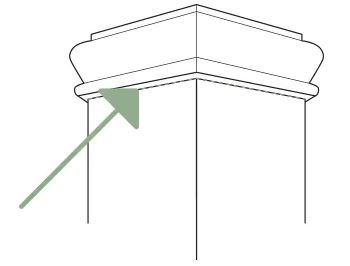
3. Using a small hammer, carefully hit the underside of the newel cap, all the way round the newel post. This should loosen the cap enough so that you can remove it. If any glue is left on the top of the newel post, clean this off so the top surface of the newel post is flat.
Please note: If the previous cap was attached with a large amount of glue, it may be difficult to remove without damaging the top of the newel post in the process. If this happens, you will need to sand or fill in the top of the newel post to create a flat surface for the new cap.
4. Make sure your new newel cap fits the newel post. Take some wood glue and place a small amount in the centre of the flat surface, so nothing can spill down the sides.
Attach the cap firmly and fix it with masking tape, so the cap stays in place while the glue dries.
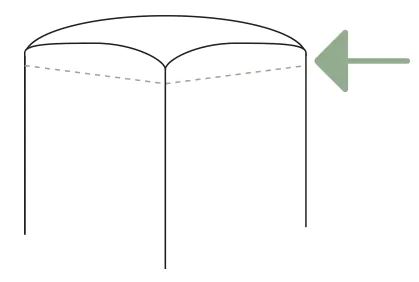
How to replace an acorn/ball newel cap with a flat newel cap
Replacing an acorn or ball newel cap with a flat newel cap is a great way to modernise your space without spending a lot of money. Our experts have everything you need to know.
Most ball newel caps are held in place with PVA glue. They also usually have a peg that fits directly into the newel post. Removing this type of newel cap can be problematic due to the peg and the amount of glue needed to secure the cap.
If you don’t feel confident removing this type of newel cap, contact a joiner for advice.
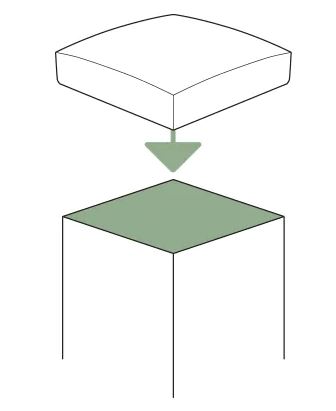
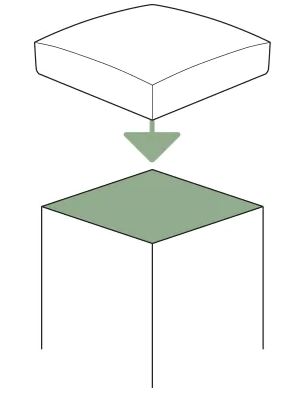
The easiest way to remove these caps is to cut them off. They usually have a curved top, so cutting this flat will help prepare the newel post for the new flat newel cap.
- You will need to cut straight across the newel post to create a flat surface. This is best done by measuring where you need to cut, then using a spirit level to mark the cut and make sure it’s flat. If the newel post is painted, apply masking tape to the surface of the post to avoid damaging the paint.
2. Once you’ve cut off the top, sand and/or fill in the surface so it’s completely smooth.
3. Make sure your new newel cap fits the newel post. Take some wood glue and place a small amount on the centre of the flat surface, so nothing can spill down the sides.
4. Attach the cap firmly and hold it in place with some masking tape while the glue dries.
What size newel post cap do I need?
To ensure you buy the correct size cap for your newel post you will need to measure (usually in mm) the top sides of the post. Many newel caps come in a standard size, but always measure to make sure. Your new cap will also come with a small rebate so should fit snugly.
What is a newel cap used for?
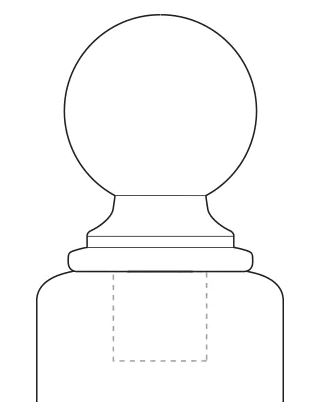
A newel cap is used as a finishing touch to your newel post, and can be either simple or elaborate in design. Whether choosing flat, ball or acorn caps they add an extra element to your staircase decor.
Newel caps from Jackson Woodturners
View our range of newel caps here to find the perfect finishing touch for your balustrade. We are experts in stair parts and have a wide range of materials, parts and fixtures and fittings to choose from.
If you’re redesigning your staircase and want more information, take a look at our planning and advice section. For more on newel posts read our complete guide to newel posts here, for information on the different types of newel posts, fixings and accessories and much more.
Contact the team if you have any questions about newel posts caps or any other stair parts—call us on 0114 272 1228 or email [email protected]


